…post a newsletter
Once a newsletter is read for publishing, it should go onto the website – both for reading, but also as the long term archive.
A couple of general points – publish a pdf file, rather than a word document (use the File.. Export menu in Word). Also, as the newsletter is a benefit to members, we restrict access for a few months, to give some exclusivity.
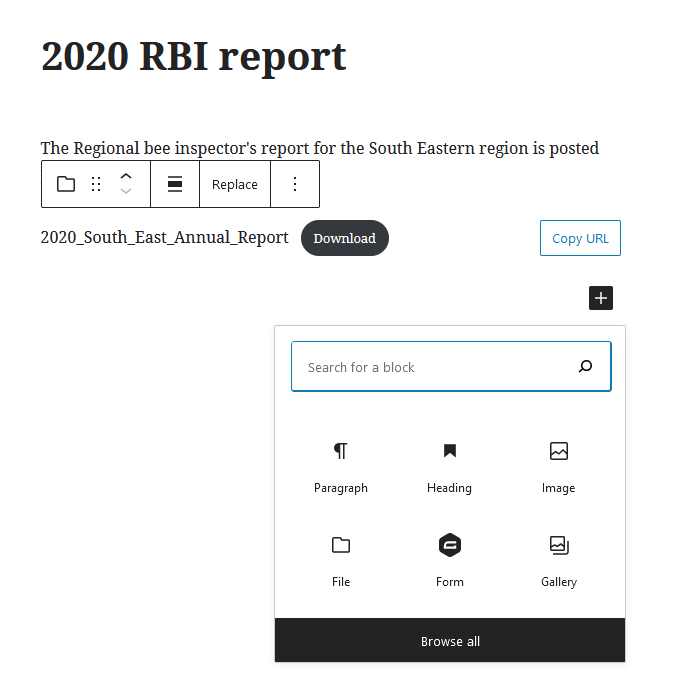
On the WP dashboard, under Posts menu, select Add New. You can copy/paste the title and post text from a previous newsletter post – just remember to update the dates! To attach the file, click the black + sign to add a new block, pick the File block, and then Upload the file from your desktop. Hit the blue Publish button.
To complete the process, you now need to classify the post, and restrict access to members. View the Post, hit the ‘edit post’ button, and direct your attention to the ‘Categories’ dropdown menu on rhs, and choose some categories (typically ‘membership’, ‘CBKA news’ and ‘newsletters’). Direct your attention to the panel below the post, and in the restrict access section, tick the box for ‘protect this page and its descendants’. From the list of available groups, add ‘members’. Don’t forget to click the blue Update button at the very top of the page, to save your changes.
… Display membership details
I won’t attempt to describe this in detail, for it is a little fiddly! This needs to be done carefully to check that details are only shown to people logged into the website (GDPR, privacy etc). Some members ask that their details are not shared within the branch.
There are two tools that can be used, gravity forms/view and cfdb. The older mechanism involves the cfdb-table shortcode. Note that cfdb makes a copy of the membership table, so might be slightly different from the gravity table.
Data collection is done with a GravityForm. Display of the data is done with GravityView (both are paid-for functions). You have to create a GravityView telling it what table to read from. Here you can adjust sort function, filter out those members who want to keep their address/phone private, and decide exactly how the table looks.
Customise the view with the ‘Entries Fields”; hide the private people with “View settings…Filter and Sort”, and sort the data with the same menu.
I also create a cfdb view for the private people, as I can limit the view to just logged in members with “editor” status. This is restricted to just a few committee members.
Look at prior versions of the page https://canterburybeekeepers.org.uk/members-20-21/ to see how these data can be displayed. It gets a bit fiddly when there are multiple data tables – each one has to be displayed separately. This occurs when we have training courses, and if the full membership details are spread over two tables.
…Update SSL certificate
To enable SSL, and use the https;// addresses, a website needs an SSL certificate. We bought ours from GoDaddy, the company that provides hosting for the site. Once in a while (last time was 24 Jan 2021), they ask us to verify we own the site. GoDaddy provide some instructions. Basically, I use the GoDaddy management console, to ftp to the folders of the website, and upload a file, according to the instructions.
They provide a little bit of code that I include on the homepage to show that our site has been SSL verified. SSL is not the same as a virus scan, but means that information sent to the website (logins, web forms etc) are encrpyted, and therefore personal information is safer.
…Manage website access (1)
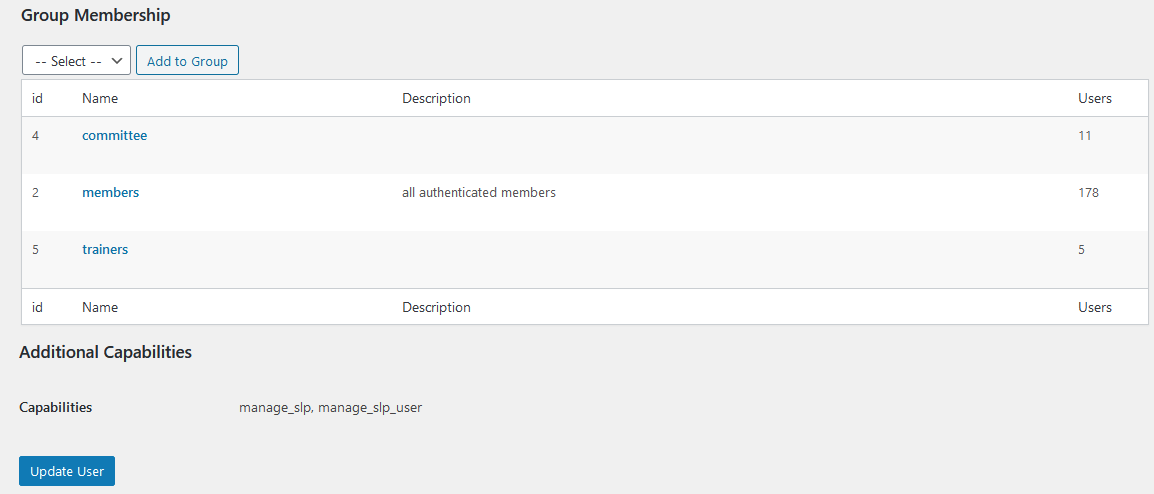
This section deals with people who already have access. All validated members and friends of the branch should be placed into the “members” group. We all have a group for the committee, and for trainers.
The members group is used to ensure that personal information is only available to validated members (who are logged in). Each page or post on the website can be visible “publicly” or privately, via these group settings.
To check a user’s memberships: From the dashboard menu on LHS, click “users”, and search for the individual in question. Edit their details, and scroll to the bottom, where you should find a Group Memberships section. Select the members group: